The Best Way to Label Personal Belongings for Recovery

Kevin Hall
Apr 14th, 2026
·10min read
Apr 14th, 2026
·10min read
If you want the short answer first, use this:
The best label is not the one with the most information on it.
It is the one a normal person can use in ten seconds.
If somebody finds your water bottle at a gym, your child’s lunch box at school, your keys in a changing room, or your bag at a venue, they should be able to answer two questions immediately:
That is the real job of a recovery label.
This guide explains what to label, what to write, what not to reveal, and which label setup gives everyday belongings the best chance of coming back to you.
People often label belongings for identification, but recovery is slightly different.
A recovery label needs to do four things well:
That sounds obvious, but many labels fail because they only solve one of those points.
Examples:
The best label for lost-item recovery is usually:
If you only remember one principle from this article, make it this:
Your label should help an honest finder contact you without forcing you to publish your life on the outside of the item.
For most everyday belongings, these are the strongest details:
Good contact options include:
What works best depends on the item and where it usually gets lost.
For example:
If you want a simple rule, use this structure:
Name + one safe contact route + optional finder instruction
Examples:
Alex - If found, please text 07XXX XXX123Sam Patel - [email protected]Scan to contact ownerIf found, please call parent: 07XXX XXX456That is enough for most recovery situations.
This is where a lot of people get the balance wrong.
Avoid putting these on the outside unless there is a very specific reason:
Why?
Because a recovery label should reduce friction, not create a privacy problem.
If you publish too much, you make the item easier to misuse and harder to verify later.
A better approach is:
Private proof details can include:
Those details are useful later if somebody says they found the item and you need to prove it is yours. If that becomes necessary, use How to Prove an Item Is Yours When Someone Finds It.
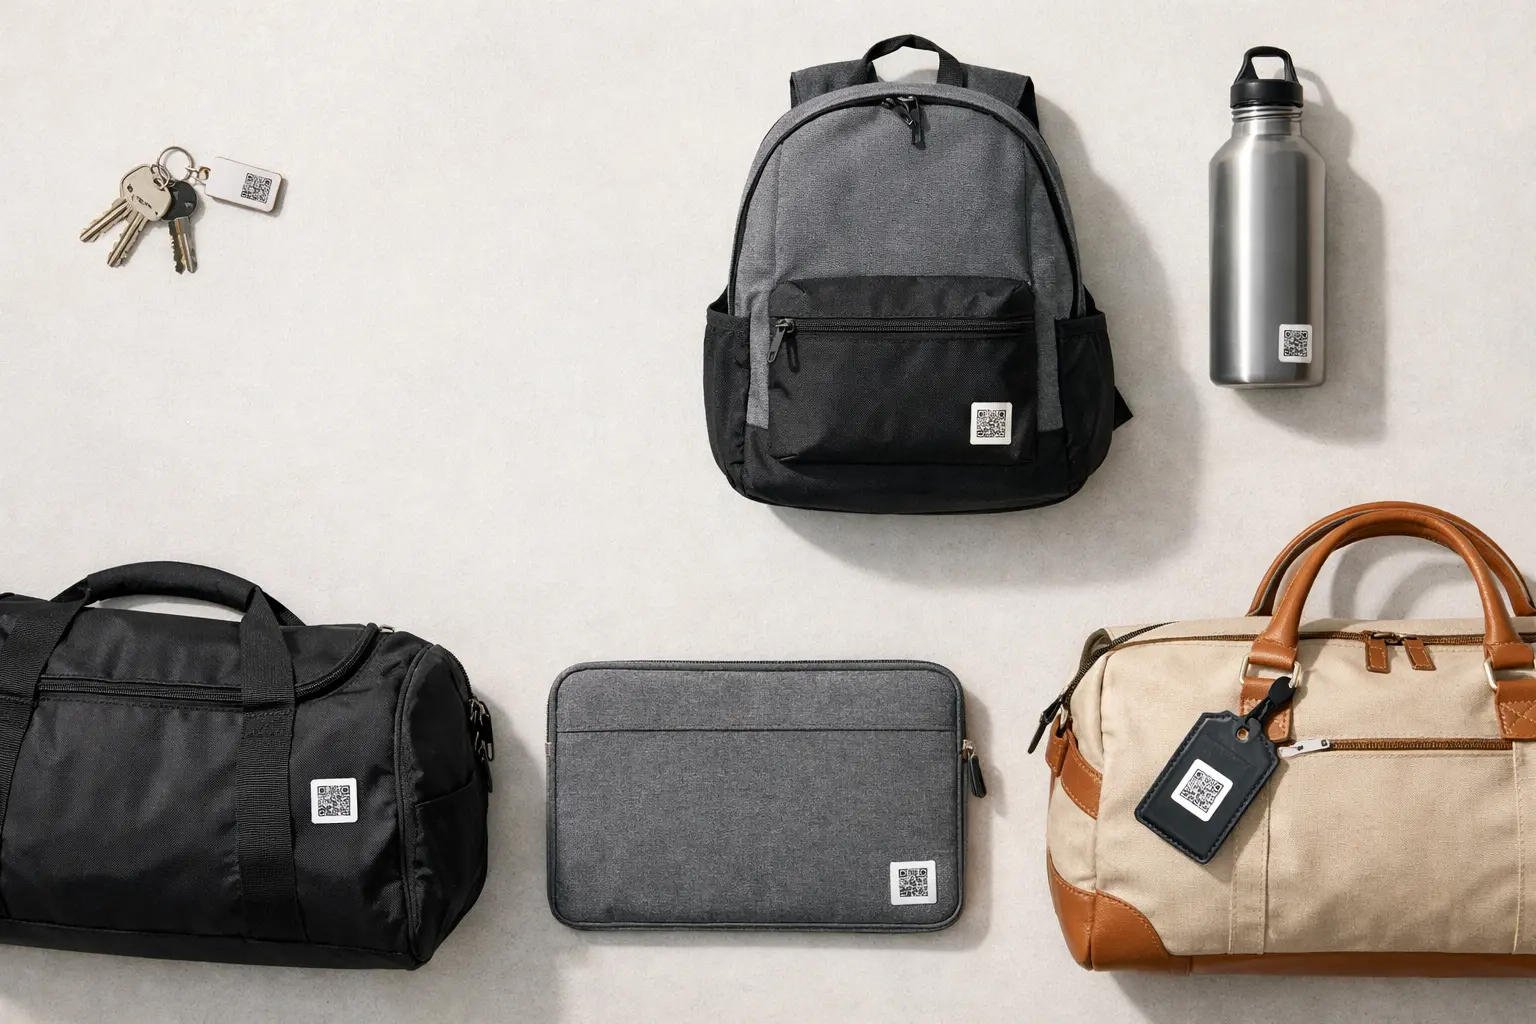
The right label depends on how the item is usually lost and who is most likely to find it.
| Item type | Best label setup | What to include | Placement tip |
|---|---|---|---|
| Keys | Durable key tag or QR tag | First name and one direct contact route | Put it on the keyring, not loose inside a pouch |
| School bag, lunch box, water bottle | Waterproof printed label | Child’s first name plus parent contact or QR route | Outside for easy hand-in, backup label inside |
| Coat, PE kit, gloves | Sew-in or iron-on label inside, plus bag label | Name and parent contact | Use inside-garment labels and label the main bag too |
| Gym bag or sports kit | Waterproof label plus optional QR | Name and one monitored contact | Label both the bag and a detachable pouch or case |
| Laptop sleeve, tablet case, instrument case | QR label or contact label | Name, email, or recovery page | Put it on the case or sleeve rather than the device if possible |
| Travel bag or luggage | External luggage tag plus internal backup label | Name and contact route | Use one obvious outer label and one inside in case the outer tag breaks |
This is usually more effective than treating every belonging the same way.
A lunch box, a house key, and a laptop bag do not move through the same recovery path.
If you are comparing label types, here is the practical answer:
A standard name label wins on simplicity.
It is cheap, easy to notice, and works well in environments where items are usually handed to reception, teachers, coaches, venue staff, or a lost-property desk.
A QR label wins when you want to protect your privacy a bit more while still making the return process easy. Instead of exposing a phone number on the item, you can let the finder scan the code and reach you through a form or masked contact route.
A tracker helps with a different problem. It is not really a label. It is a location tool.
That is why many people get the best results with one of these setups:
If you want the full breakdown of label-versus-tracker tradeoffs, read AirTag vs QR Code Tag: Which Is Better for Recovering Lost Items?.
A good label in the wrong place often fails.
The goal is to make the label visible when somebody is deciding what to do with the item.
Useful placement rules:
Examples:
Think about the hand-in moment.
If a cleaner, teacher, receptionist, coach, or stranger picks the item up, what part of it will they see first?
That is where the recovery label belongs.
If you are overthinking the exact wording, keep it simple.
Here are good examples:
For keys
If found, please text Alex: 07XXX XXX123Scan to contact ownerFor a school bag
Maya - Parent contact: 07XXX XXX456If found, scan for return detailsFor a water bottle or lunch box
NoahIf found, scan for parent contactFor a gym or sports bag
Chris - [email protected]If found, please contact owner via QRFor a travel bag
A. Khan - [email protected]If found, please message using QR codeNotice what these examples do not include:
Recovery labels work best when the message is easy to act on, not when it is overloaded.
This is where labeling matters most because the volume of mix-ups is so high.
For children’s school gear:
For university, school, and campus settings more broadly:
If the relevant environment is school or campus-based, read Lost and Found at Universities and Schools: What Students and Parents Should Do.
For sports kit and gym belongings:
If the relevant setting is a gym or sports facility, read Lost and Found at Gyms and Sports Centres: Fastest Way to Get Items Back.
This part matters.
Labeling belongings improves the odds of return, but it does not eliminate the need to act quickly if something actually goes missing.
If the item is already lost:
Start with What to Do in the First Hour After Losing Something Important if the loss is fresh.
Then use the recovery guide that matches the item:
The label is the prevention layer.
The report, search, and follow-up are the recovery layer.
You usually want both.
Should I put my phone number on a label?
Usually yes, if you are comfortable doing so and it is a number you actively monitor.
If privacy is a concern, use a dedicated recovery number, recovery email, or QR route instead of placing your main personal details on every item.
Are QR labels worth it for ordinary belongings?
Yes, especially when you want a cleaner return flow without publishing too much information. They are most useful on bags, cases, school gear, sports kit, and electronics sleeves that are likely to be handled by a person who can scan the code.
Should I label wallets and passports?
Be careful.
For wallets, a discreet contact card inside can help, but do not overload the outside with sensitive personal information. For passports, avoid attaching anything directly to the passport itself that could interfere with it. If you use a passport holder or travel wallet, label the holder rather than the document.
Is a first name enough?
Sometimes.
A first name may be enough for low-risk mix-up prevention inside a school or club setting, but true recovery usually works better with a contact route as well. A name-only label helps identify. A recovery label helps return.
What is the best single setup for most people?
For most ordinary belongings, the best setup is a durable contact label or QR label with minimal public information.
For higher-value items that may keep moving, the best setup is usually a tracker plus a clear recovery label.
Whether you've lost a cherished item or found something that belongs to someone else, posting an ad on lostandfound.io can help reunite items with their owners. It's free and easy to do.
Post a FREE ad